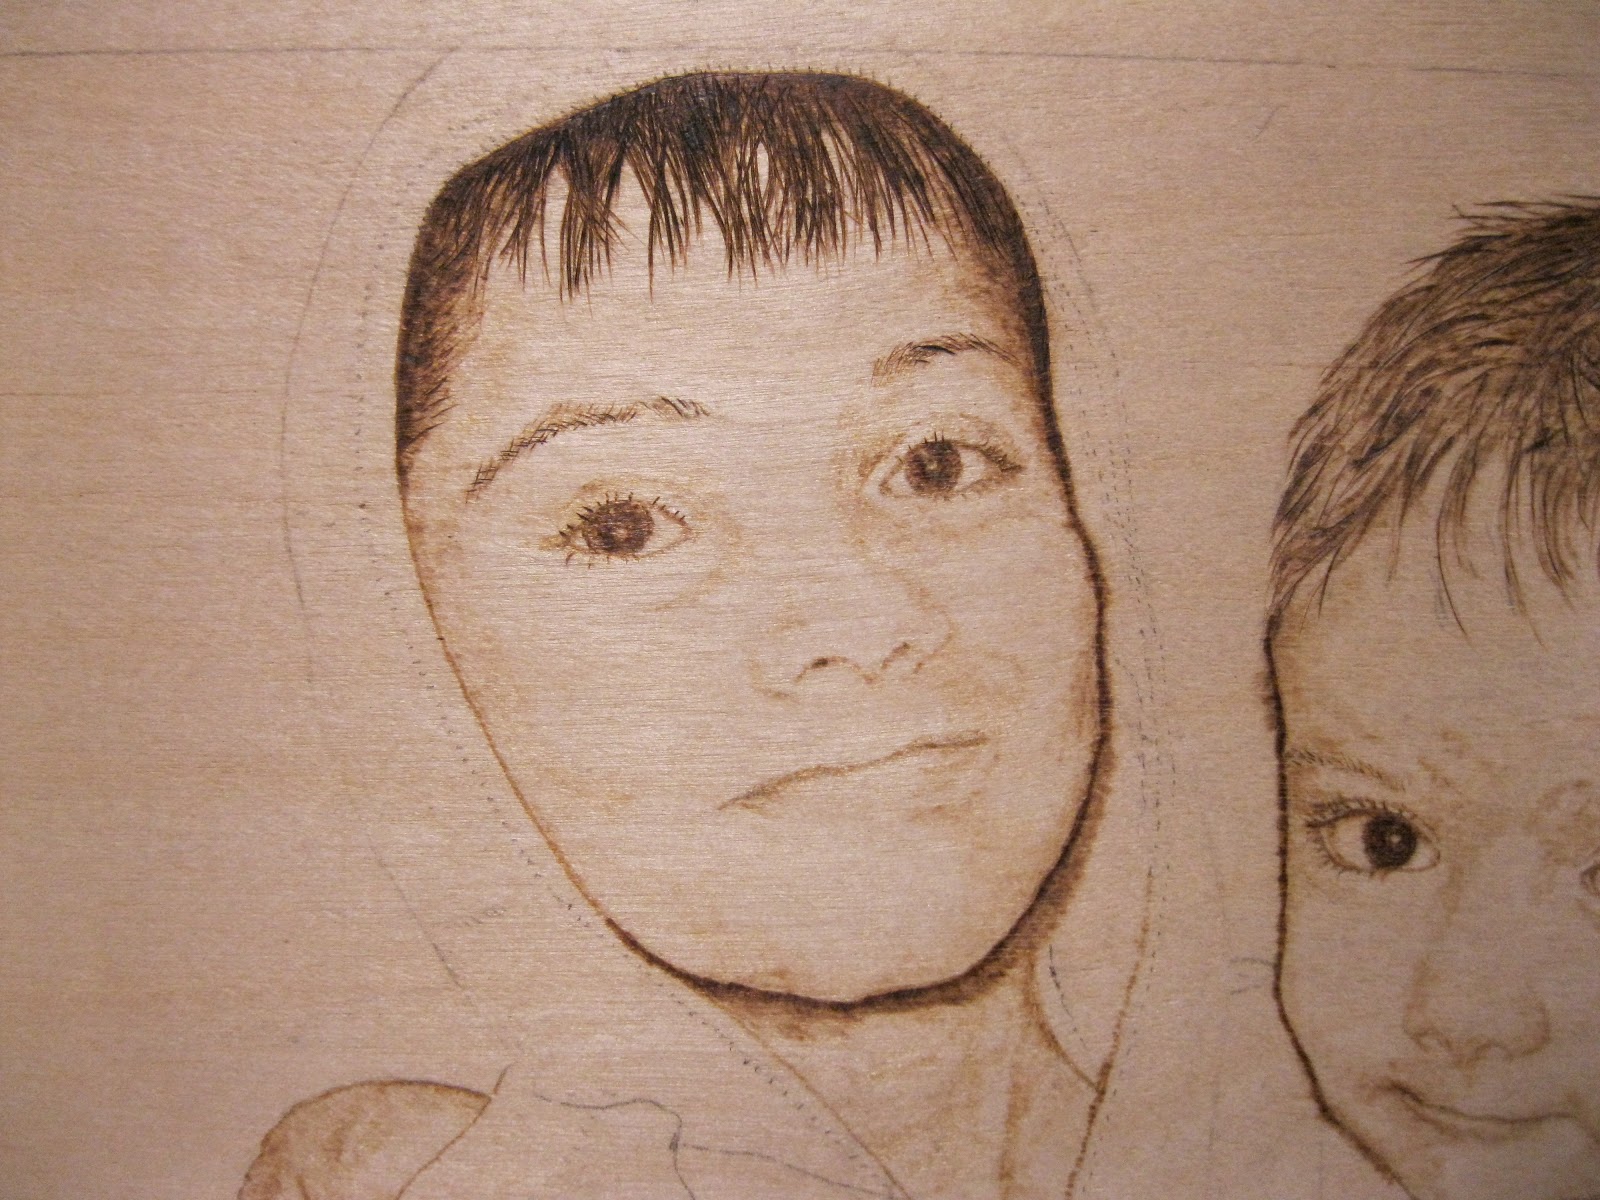
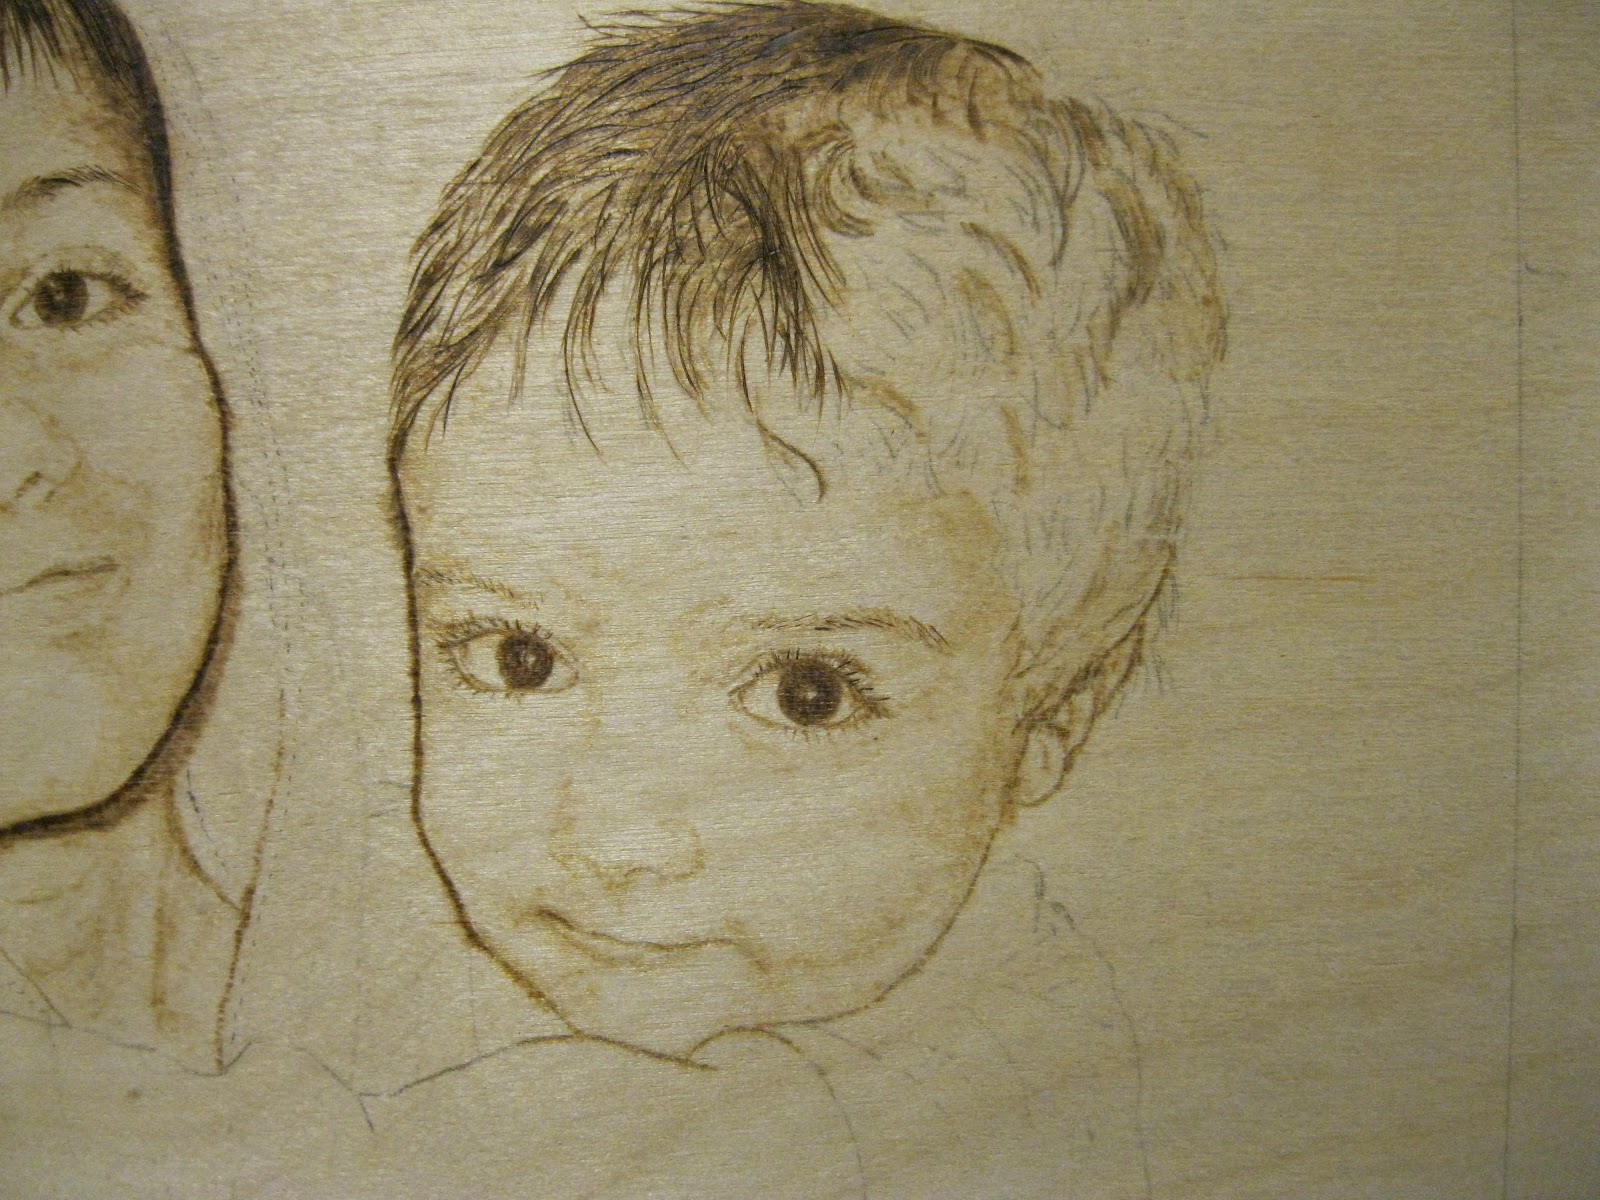
Wow, I actually am doing another blog entry! Amazing! Here's the next stage of shading. I worked a loooooong time on the hair and hoodie. The depth of shading was quite layered.
Then I forgot to take pictures for a fair bit of the next stage. I worked extensively on the shading of the shirts and deepening the previous work as I went. I think the arm sleeve was most fascinating for me, as I watched it move from flat to contoured and supple. I learned so much through this stage about shading and light. I still have allot to learn, but I love the progress and the effects along the way.
As I started filling in the background, I loved watching the main images start to deepen and gain some depth. And of course, I kept going back and touching up more of their faces and clothing, as I went.
I will post the last photos in my next post, which I hope is sooner than my average! Fun, fun, fun! =)
Hope you're liking the pic.s And have an awesome day! =)
Pyrography Portraits by Woodluv is a blog set up just for my portrait wood burnings. This is a new interest of mine, and I hope you'll enjoy the process with me. If you'd like me to do a wood burned portrait for you or someone you love, email me at woodluv@telus.net and we can discuss the details...
My New Blog
If you're finding my blog already and there's not much here yet, you're one of the privilaged first visitors =) Over the next few days, I'll be posting my first entrys of some of my first Pyrography Portraits - Wood burned Portraits. Check back soon, and I hope they inspire you!
I may sometimes post with smaller entries and fewer picture for each, posting as I move through a portrait, instead of putting it all up there at once. Partly so it's easy for me and maybe, too, so it's more fun for you, with the anticipation of what's coming next, right?!
Friday, April 26, 2013
Saturday, March 16, 2013
Pyrography Portrait - My Boys No. 2
Wow, so I left a rather long gab between posts! Better late than never, though, right?! Well here we go:
After I had shaded in the faces in their basic elements, I started on the hair for both of them, as well as the edges of our older one's face as it receded into the hoodie. Creating the illusion of depth and contour is key to the image - I'm still certainly learning about this as I go. If you want to add depth and contour in your shading, start learning the art of sketching portraits. I am doing this on the side in the back ground and learning to free hand my drawings, and it is really helping me to understand many basic principles for contour, depth and roundness.
Here is an overall shot showing the progress so far. I do jump around a bit as I go, as this gives me better perspective. As I notice areas that need more shading or need more definition, I move to those spots and therefore hop across the overall image a fair bit, but I like working this way, as I think it brings a unity to the finished piece.
Our youngest son has very large eyes! He's always been so expressive with them, too, they almost talk for him much of the time! I really wanted to capture this in the image, along with his crazy going-everywhere sort of hair =) Our oldest, in contrast has very relaxed eyes and a quiet smile sometimes, which again, is a beautiful part of his nature that I wanted to reflect. It was fun thinking about the differences in the two of them, as I worked on this portrait.
So here you see the next overall image showing hair mostly done (no part or section is totally done at this point, of course), and next it is on to the clothing...
Check back soon, I'll even mark it in my day timer so I actually make my next post within a week or so - yup, I think I need the help.
Side note, I'm working currently on my Mother-in-law's Dad's enlistment photo right now. It shows him at 18yyears of age in his aviation suit coat and hat. When I'm done, I'll ask her if I can post it for you all to see =)
By the way, If your seeing this and would like me to do a wood burned portrait for you of someone you know or of an old photograph of someone in your family, just contact me via my Etsy shop (you'll see the shop on the right side of your screen near the top of this page) and we'll go from there...
Happy Spring to you all =)
Cheryl
After I had shaded in the faces in their basic elements, I started on the hair for both of them, as well as the edges of our older one's face as it receded into the hoodie. Creating the illusion of depth and contour is key to the image - I'm still certainly learning about this as I go. If you want to add depth and contour in your shading, start learning the art of sketching portraits. I am doing this on the side in the back ground and learning to free hand my drawings, and it is really helping me to understand many basic principles for contour, depth and roundness.
Here is an overall shot showing the progress so far. I do jump around a bit as I go, as this gives me better perspective. As I notice areas that need more shading or need more definition, I move to those spots and therefore hop across the overall image a fair bit, but I like working this way, as I think it brings a unity to the finished piece.
Our youngest son has very large eyes! He's always been so expressive with them, too, they almost talk for him much of the time! I really wanted to capture this in the image, along with his crazy going-everywhere sort of hair =) Our oldest, in contrast has very relaxed eyes and a quiet smile sometimes, which again, is a beautiful part of his nature that I wanted to reflect. It was fun thinking about the differences in the two of them, as I worked on this portrait.
So here you see the next overall image showing hair mostly done (no part or section is totally done at this point, of course), and next it is on to the clothing...
Check back soon, I'll even mark it in my day timer so I actually make my next post within a week or so - yup, I think I need the help.
Side note, I'm working currently on my Mother-in-law's Dad's enlistment photo right now. It shows him at 18yyears of age in his aviation suit coat and hat. When I'm done, I'll ask her if I can post it for you all to see =)
By the way, If your seeing this and would like me to do a wood burned portrait for you of someone you know or of an old photograph of someone in your family, just contact me via my Etsy shop (you'll see the shop on the right side of your screen near the top of this page) and we'll go from there...
Happy Spring to you all =)
Cheryl
Saturday, February 9, 2013
Pyrography Portrait - My Boys - No. 1
This is the beginning of the pyrography portrait of my boys. I started from a photo of them and a basic line drawing. Did I use the photo as a guide for the line drawing? Absolutely, yes. Do you like candid and real? Hope so, it's what I prefer...
And now - I digress - I spend much time working with the photograph to create my own line drawing, a final basic image that I feel best expresses the original. There are many possible ways that the initial image could be drawn and shown, each one will change what the final art piece looks like. Some would say that since I did not free hand sketch the initial line sketch, that my art is not original. I, of course, will be rather bold and say, I believe it is very original! No two people could wood burn the same image and come up with the same design in the end. Why? Because each artist will have his or her own interpretation of what he/she sees and how it is put down on the wood. Am I pursueing free hand sketch work? Absolutely! Do I respect those that use the free-hand method? Absolutely! Do most free-hand sketch artists always capture the true likeness of an image every time? Not always, at first. So as I work behind the scenes on my free-hand skills, I fully intend to continue growing my artistic abilities with my wood burner, and I believe that as I do both, I will only improve as an artist.
The central elements of each face and the hands, with thier basic shading started first. I wanted to start with the most expressive elements first. I think any time you are creating an image based in reality and especially a portrait, you seek to not only pull out the overall correctness of the image, but you want to capture something of that person's character and sole. Our sons love each other very much and their fondness for each other was something I really wanted to grasp.
No part of this portrait was rushed. To put it mildly, I spent much time on each little element or feature. Progress was slow, but then what is your definition of progress? If it is to simply get some surface area done, than I could have gone much faster; if it is to capture each individual element as you go, with as much accuracy and detail as you can along with keeping the emotion of the piece, than you're not so worried about time.
This is a real art form that I want to pursue and learn and grow in as I go, and so to me, the fun was and is the process itself. It's not a race, it's an expression, moving and growing as I will along with it.
OK, sounding flaky now, I know. I have never been one to really talk about what I'm thinking as I do my work, but these are the kinds of things I think about...
So here's post No. 1 of several as I moved through this portrait.
Feel free to contact me if you are thinking of having a custom protrait done of someone you know, if you would like to know more about details, costs, etc. I would be very honored to work on a pyrography portrait for you and grow as an artist in the process.
I hope this posting series will be as much fun for you as it is for me!
Cheryl
P.S. If you are a growing artist, I hope this blog will be an inspiration for you, keep doing what you love, push and challenge your abilities, let time pass as it should in times of growth, and you'll find you will create amazing things. God put that creativity inside you, He wants you to stretch it! And have fun, too =)
First ever Pyrography Portrait
THE LOVE GOD HAS PLACED BETWEEN A FATHER AND HIS DAUGHTER IS TRULY BEAUTIFUL!
Welcome to my brand new "Pyprography Portraits by WoodLuv" Blog! This is my first posting and very first wood burned portrait! I have been woodworking for years and am a lathe turner specializing in Custom Made Kokeshi Dolls. If you like, check out my Kokeshi Blog, too =)
For my first Portrait, I chose my husband and baby daughter. This photo has always been one of our favorites. The closeness between Father and Daughter is so personal and so deep, you can feel it.
Not really sure if I could do what I saw in my head and in the picture, I just jumped in and gave it a try, learning as I went. I use a solid tip wood burner, the old fashioned soldering iron style, and not much is out there for free "how to" type info, so I just decided to go for it, and see what happened.
I am very please with how it turned out and it has really inspired me to do more portrait work. This Daddy very much loves his little girl, and I felt privileged to be able to freeze the moment, using the original photograph, of course, as my starting point.
My Mom-in-Law took this photo and I think that's another thing about it that I love. I was able to take her artistic abilities with her camera and turn her photo into personalized portrait art. Our daughter wants this on her wall, and I'm sure it will be special to her for years to come, since it is of her and her Daddy, and made by her Mommy from a photo taken by her Nana. Very special indeed!
I wish now that I had taken some process type photos, but at the time, this was just something that I wanted to see if I could do and didn't realize how much I would enjoy it and how much I would be so interested in the process and the journey of doing it. It's bit me, now, though and there will be more to come! I have just finished a pyrography portrait of my two boys, so I'll start posting some of that one soon! =)
If you like commenting, let me know what you think! God Bless You Deeply and have a wonderful day!
Cheryl
Subscribe to:
Posts (Atom)